


7 Dynamic Upper Body Workouts with Resistance Bands for All Fitness Levels

Upper Body Workouts with Resistance Bands are one of the most effective ways to stay fit right at home. You can easily strengthen and tone your arms, shoulders, chest, and back muscles without the need for heavy dumbbells or a gym membership. Resistance bands are not only lightweight and portable, but they are also suitable for people of all fitness levels.
Whether you are a beginner or an experienced fitness enthusiast, these band-based exercises will give you the opportunity to improve your overall upper body strength and stability.
According to Harvard Health, Upper Body Workouts with Resistance Bands help build strength safely.
What are Resistance Bands?
Resistance bands are a type of fitness equipment made of elastic rubber or fabric that provides resistance for strength training and muscle building. When stretched, they create tension or pressure on the muscles, which is as effective as using heavy weights.
Their main advantages are: they are lightweight, easy to carry, and available in a variety of resistance levels, making them suitable for everyone from beginners to experienced athletes. Resistance bands put less stress on the joints than free weights, making them ideal for recovering from injuries and low-impact workouts. Loop bands, mini bands, and tube bands with handles are some of the main types. They are an excellent option for doing full-body exercises, including upper-body exercises, at home or on the go.
Benefits of Using Resistance Bands for Arm Workouts
Using resistance bands for arm workouts is a great idea. These tools help stabilize the muscles, which ensures effective engagement of the biceps, triceps, and shoulder muscles.
The most significant advantage is its variable resistance. The more the band is stretched, the more the muscles are challenged, which stimulates muscle growth within a specific range of motion. They are more compact and portable than dumbbells, so you can continue to exercise your arms anywhere, whether at home or while traveling.
In addition, they put very little stress on the joints. As a result, those with elbow or shoulder injuries can safely use resistance bands to increase strength and muscle tone. It is an effective tool suitable for both beginners and experienced users.
Effective Upper Body Exercises with Resistance Bands
1. Resistance Band Chest Press
The chest press is basic. The advantage of doing it using a resistance band is that it puts less stress on the joints and helps increase muscle stability.
How to do it?
Preparation: Hold the band horizontally across the middle of your back. Hold the two ends or handles of the band in your palms so that the palms are facing down.
Position: Stand straight with your feet shoulder-width apart. You can bend your knees slightly and lean forward if you want, or you can do this lying on the floor.
Start: Place your hands next to your chest, elbows bent at a 90-degree angle, and feel the tension in the band.
Press: As you exhale, straighten your arms and press them forward so that your palms are facing each other. Tighten your chest and arm muscles.
Return: While inhaling, slowly and in a controlled manner, return your arms to the starting position. Do not let the band pull back too quickly.
Reps: Repeat this process for your set and reps.
Tips
Do not lock your elbows completely while pressing. Keep your elbows slightly loose. If the band feels loose, tighten it or use a stronger band.
2. Resistance Band Rows
This is a great exercise to strengthen your back muscles, especially the lats and middle back muscles.
How to do it?
Preparation and Position: Sit upright on the floor. Extend your legs straight out in front of you.
Place the resistance band between your legs and wrap the band around your ankles. Hold the ends or handles of the band in both hands. If there are no handles, hold the part of the band so that you feel some tension at the beginning.
Start: Keep your back straight, core tight, and knees slightly bent. Your arms will be extended in front of you.
Pull: As you exhale, pull the band toward your waist, keeping your elbows close to your body. Try to squeeze your back muscles (especially your shoulder blades) together. Remember, you should be pulling with your back muscles, not your arms.
Return: As you inhale, slowly and in a controlled manner, extend your arms back to the starting position. Do not let go of the band quickly.
Repetitions: Do the number of repetitions required to complete a set.
Tips:
Posture: Make sure your back is always straight. Do not lean forward or backward.
Control: More critical than pulling the band is slowly returning it. This negative motion is significant for building muscle.
Variation: You can also do this exercise while standing with the band tied to a pole.
3. Resistance Band Tricep Extensions
This exercise effectively targets all three parts of the triceps and builds strength in the back of the arm without putting pressure on the shoulders.
How to do it:
1. Preparation: Stand up straight. Grab one end or handle of the resistance band with your right hand. Now throw the band back over your head.
2. Position: Grab the other end or handle of the band with your left hand and keep that hand steady near your waist. This hand will act as an anchor or locking point.
3. Start: Fold your right arm (the hand that has the band) over your head at a 90-degree angle. The elbow should be near your ear or facing straight up. Keep your core tight.
4. Extension: While exhaling, extend your right arm straight up without changing the position of your elbow (keeping your elbow still). Contract your triceps muscles.
5. Return: While inhaling, slowly and in a controlled manner, bring your arm back to the starting 90-degree angle. Do not let the band drop too quickly.
6. Repetitions and Variations: After completing the required number of repetitions, switch arms and repeat the exercise for the left triceps in the same manner.
Tips:
Keeping the elbow still: Make sure that only the lower part of the elbow is moving. The elbow should not swing left and right or back and forth.
Full Extension: Try to fully straighten the arm upwards to ensure maximum contraction of the triceps.
Resistance Adjustment: If you find the band too easy, move the anchor hand held down further down on the band, which will increase the tension.
4. Bicep Curls with Resistance Bands
This exercise targets the biceps and builds arm strength.
How to:
Preparation and Position: Stand straight, feet shoulder-width apart. Place the middle of the resistance band under your feet. If the band is long, spread your feet slightly apart or wrap the band around your feet once. Grasp the two ends or handles of the band with your palms facing up.
Start: Keep your arms straight at your sides. Keep your core tight.
Curl: As you exhale, keep your elbows at your sides (the elbows will act as a lock), and pull the band toward your shoulders, palms facing up. Only your lower arms will move. Contract your biceps muscles as much as possible.
Return: As you inhale, slowly and in a controlled manner, return your arms to the starting position. Do not let the band drop too quickly. Controlled lowering is essential for building biceps.
Reps: Do the required number of reps.
Tips:
Keep your elbows still: Make sure you are not using your body weight by leaning forward or backward. Keep your elbows close to your body.
Proper resistance: If you can’t curl your arms fully or have to use your body, the resistance of the band is too high. Space your feet slightly less or use a weaker band.
Feeling tension: Don’t let the band slacken during the lowering to maintain pressure on the muscles.
5. Resistance Band Lateral Raises
This exercise targets the shoulder muscles, especially the middle deltoids, which give the shoulders a rounded and well-shaped appearance.
How to do it:
Preparation and position: Stand up straight. Place the middle of the resistance band under your right leg. Hold the other end of the band in your left hand. Hang your left arm straight at your side. Keep your right arm free or on your waist. You can also do this with both hands at the same time (holding the band in the middle under your feet and holding the two handles with both hands). However, doing it with one hand at a time allows for more focus on form.
Start: Keep your core tight, keep your back straight, and place your feet shoulder-width apart. You should feel a slight tension in the band.
Lift: As you exhale, raise your left arm to your side with your elbow slightly bent. Raise your arm to shoulder height, so that your arm is parallel to the ground. Remember, your arm should not come in front of your neck.
Return: As you inhale, slowly and in a controlled manner, lower your arm to the starting position. Do not let the band drop too quickly. Lowering at a controlled pace is very important for your shoulder muscles.
Modification: Complete the required number of repetitions and then repeat the exercise with the other arm.
Tips:
Please focus on the little finger: When lifting your arm, raise it in such a way that your little finger goes up first. This will activate the correct muscles more.
Shoulder Pull-Apart: Keep your shoulders away from your ears as you lift your arms. Don’t let your shoulders rise.
Pace Control: This is not a speed exercise. Do it slowly, paying attention to form for maximum results.
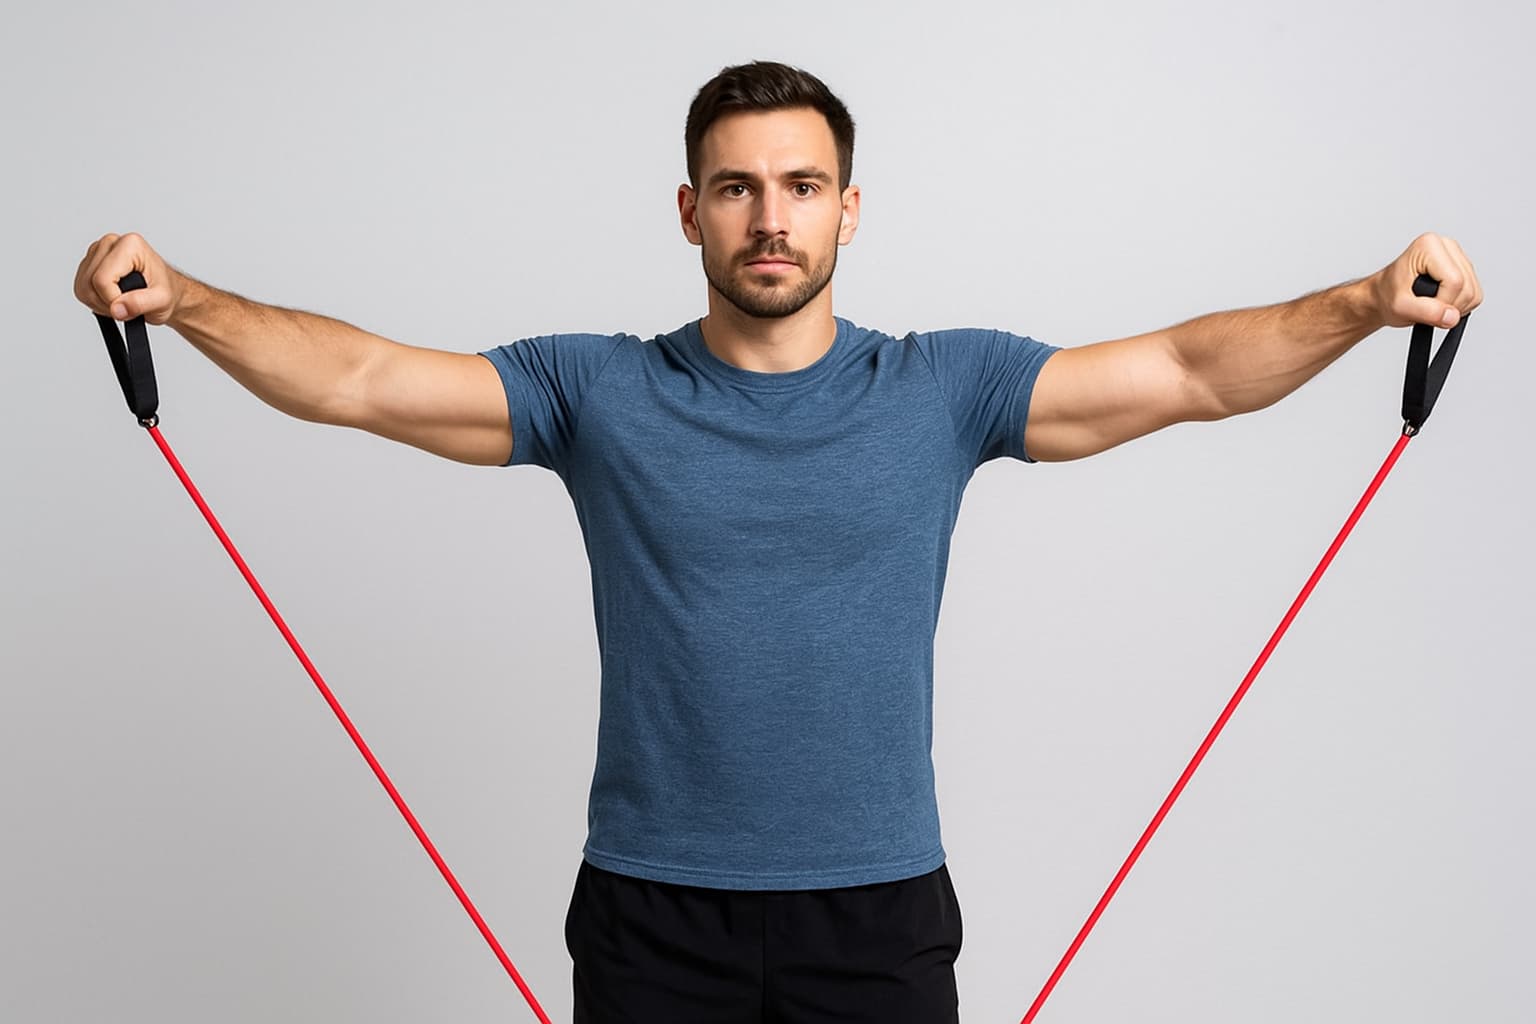
6. Resistance Band Pull-Apart
This dynamic exercise is ideal for strengthening the rotator cuff muscles of the shoulder and the rhomboid muscles of the mid-back.
How to do it:
Preparation: Stand up straight. Hold the resistance band in front of you, slightly wider than shoulder width. Your palms will either be facing down (pronated grip) or facing each other (neutral grip).
Start: Hold your arms straight out in front of you at eye level or chest height. You should feel a slight tension in the band. Keep your core tight and your back straight.
Pull: As you exhale, pull your hands out to the sides, trying to squeeze your shoulder blades together. The elbows can be slightly bent, but the main emphasis should be on the back muscles.
Final position: When you feel maximum tension in the band, pause for a second. At this point, your mid-back muscles will contract. Your arms will then form a “T” shape.
Return: While breathing in, slowly and in a controlled manner, return your hands to the starting position. Do not let the band pull forward too quickly.
Reps: Complete the required number of repetitions.
Tips:
Pace control: Never rush this exercise. Do it slowly, focusing on the back muscles.
Proper distance: If the band feels too easy, bring your hands closer to the bands to increase the resistance.
Attention to posture: This is a great exercise to improve posture for those who work by leaning forward.
7. Resistance Band Push-Ups
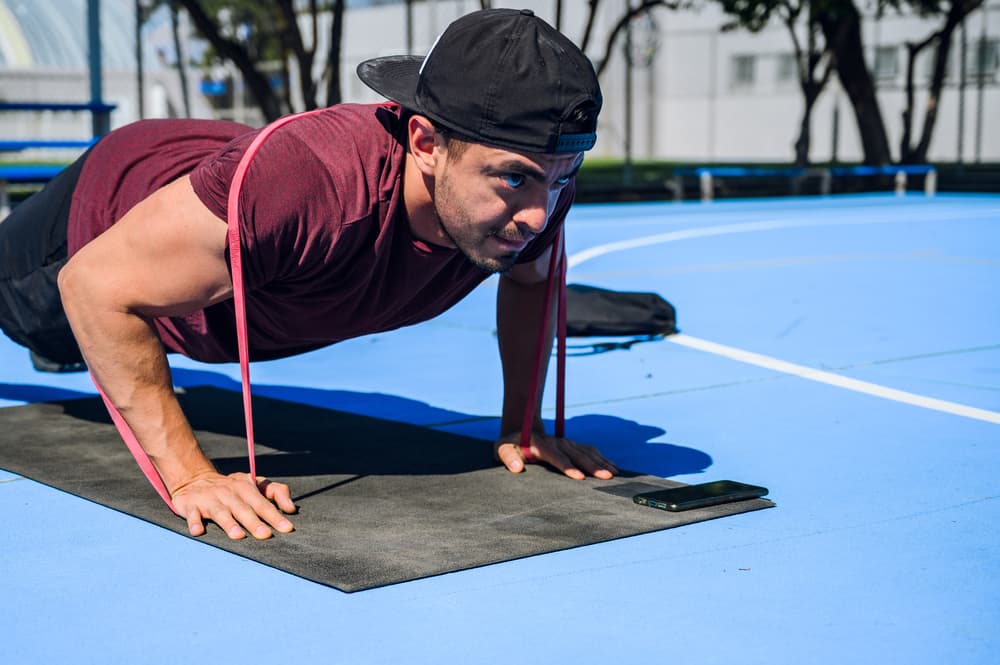
This exercise is basically the same as a chest press, but its effectiveness is multiplied by using your body weight. It builds strength in the chest, shoulders, and triceps all at once.
How to do it:
Prep: Place the band horizontally across the middle of your back. Firmly press the two ends of the band under your palms (so that the band doesn’t slip out of your hands). Your palms should be on the floor, as if you were in a regular push-up position.
Position: Get into a high plank position. Place your hands slightly wider than shoulder-width apart. Your body should be in a straight line from head to ankles.
Lower: As you inhale, lower your chest toward the floor. Lower, keeping your elbows close to your body (or slightly out). The band should stretch across your back as you lower.
Push Up: As you exhale, use your chest, shoulder, and triceps muscles to push yourself up. The band will provide maximum resistance when you reach the top of the push-up.
Reps: Repeat this process for your set and reps.
Tips:
Control: The band can push you up quickly. Always control the speed, especially when lowering.
Maintain form: Don’t let your waist sag or overextend throughout. Keep your core tight.
Resistance: If the band feels too difficult, practice it with your knees on the ground first. If it feels easy, use a stronger band.
Structuring Your Full Body Workout with Resistance Bands
Maintaining a Push/Pull Balance
A full-body routine should include a balance of push and pull exercises.
Push Day: Add triceps extensions on days when you target the chest and front of your shoulders.
Pool Day: Add bicep curls on the day you target your back.
Using Supersets
To save time and increase muscle efficiency in your full-body routine, use supersets. Supersets are exercises that work two different muscle groups in a row.
Do an arm exercise immediately after completing a major muscle group exercise without any rest.
Using as a Finisher
When you’ve completed your main compound exercises, you can add an arm exercise as a short ‘finisher’ at the very end of your routine.
This stage can be used to increase blood flow to the muscles by doing high reps or circuits of biceps and triceps exercises in a short period of time.
Frequency Adjustment
If your routine is whole body three days a week, you can include one biceps and one triceps exercise in each session. This way, you can effectively target each muscle multiple times a week.
Weekly Workout Plan
Day 1: Full Body Push Focus
The first day’s session will focus on the chest, front of the shoulders, and triceps. On this day, you will complete three sets of 15 to 20 reps of each exercise. First, activate your leg muscles with resistance band squats. Next, do resistance band chest presses for the chest. Do resistance band lateral raises for the side muscles of the shoulders and resistance band tricep extensions for the arms. At the end of the session, do planks for core stability.
2. Day 2: Rest
On this day, take complete rest to allow the muscles to recover, or do active rest such as light walking or stretching.
3. Day 3: Full Body Pull Focus
The third day’s focus will be on the back muscles, hamstrings, and biceps. On this day, do three sets of 15 to 20 reps of each exercise. Start with resistance band deadlifts to strengthen your hamstrings and lower back next, complete resistance band rows for your back and resistance band bicep curls for your arms. Add resistance band pull-aparts to improve your shoulders and posture. Finally, do resistance band side bands for your core muscles.
4. Day 4: Rest
Give your muscles a chance to recover and rebuild. You can do yoga or light cardio if needed.
5. Day 5: Full Body Balance and Endurance
This day is a summary of your entire week’s work and an endurance test. Start with resistance band push-ups on this day to challenge your chest and triceps. Do resistance band lateral walks for your leg muscles. Then finish off your arm muscles with overhead presses and high-rep bicep curls to build shoulder strength. Finally, finish the session with a bird dog exercise for core stability.
6. Days 6 and 7: Active rest and recovery
These last days of the week, whether it’s a complete rest, or a light walk in nature, cycling, or a long stretching session, will help your muscles recover and prepare for the next week’s training.
Tips for Maximizing Your Resistance Band Workouts
Proper Form and Technique
Motion Control
Work at a Slow Pace: Resistance bands work differently than free weights. The band will want to quickly return you to the starting position. Instead, slowly return the band to its original position while maintaining control over the muscle. This negative motion is crucial for muscle growth.
Avoid jerking: Never use jerks or jerks during exercises. This reduces muscle engagement and increases the risk of injury.
Use a Full Range of Motion
Full Extension: Stretch and contract your muscles through their full range of motion. For example, in a bicep curl, lower your arms completely straight and lift them as high as possible. This ensures full activation of the muscle fibers.
Correct Starting Position: Hold the band in such a way that you feel a slight tension or pull at the very beginning of the exercise. If the band is loose, the muscles will not get enough pressure.
Keeping the elbows still
When performing arm or shoulder exercises, such as bicep curls or tricep extensions, keep the elbows as an anchor point.
Do not change the direction of the exercise by moving the elbows back and forth or right and left. This will put pressure on other muscles instead of the target muscles.
Correct posture and stability
Straight back: Always keep your back straight and your core muscles tight when doing rows or overhead presses. Do not over-arch your waist.
Use the core muscles: Keep your core muscles (abdominal muscles) tight during each exercise. This maintains body stability and makes the transfer of force more efficient.
Band safety and maintenance
Check the band: Before starting the exercise, check the band for any cracks or tears. A torn band can suddenly tear during the exercise and cause injury.
Secure Anchoring: If you tie the band to a pole or door, make sure the anchor point is strong and secure.
Shoe Use: Wear shoes when exercising with the band under your feet. This increases the stability of the band and reduces the risk of tearing the band.
Increasing Resistance and Challenge
Changing the Strength of the Band
The Simplest Way: This is the most direct way to increase the challenge. If you can easily complete 20 reps with your current band, start using a medium band instead of a light band, or a heavy band instead of a medium band.
Multi-level Use: Use two bands together if necessary. For example, if you use a medium and light band together when doing a bicep curl, the resistance will be much greater.
Reducing Band Length
Technical Adjustment: If you are doing an exercise with two hands (such as a chest press or row), hold the band shorter. That is, bring your hands closer to the anchor points of the two bands (such as under your feet). The shorter the effective length of the band, the greater the resistance.
Loop Bands: With loop bands, you can increase the tension by twisting or folding the band once before starting the exercise.
Variations in Reps and Sets
Increase Reps: Try to do 20-25 reps with the same weight or resistance. This will increase muscle endurance.
Increase Sets: Increase the total number of sets from 3 to 4 or 5.
Change Tempo: Do the exercise slowly. For example, lower for 4 seconds, hold for 1 second, and lift for 2 seconds. Slowing down during the descent is incredibly effective for building muscle.
Adding Isolation and Holds
Isometric Holds: Hold the band for 2-3 seconds during the maximum contraction of the exercise. For example, when your hands come close to your shoulders during a bicep curl, hold that position for a few seconds.
Pulse: After reaching the maximum contraction position, do small pulses or small movements. This will create intense irritation in the target muscles.
FAQ
1. Can you build muscle with Upper Body Workouts with Resistance Bands?
Yes! Resistance bands create enough tension to build and tone upper body muscles when used regularly and correctly.
2. How often should I do Upper Body Workouts with Resistance Bands?
Do them 3-4 times per week, allowing rest days in between for proper muscle recovery.
Transform Your Strength with Upper Body Workouts with Resistance Bands
Upper Body Workouts with Resistance Bands is not just an exercise, it is a habit that helps make your body stronger, more flexible and balanced. You can effectively build your arms, chest, shoulders and back muscles at home without having to lift heavy weights or spend time in the gym. With regular practice, you will not only see improvements in your muscles, but also in your posture, balance and confidence.
Choose the resistance of the band according to your fitness goals and keep your daily training consistent. Remember, small changes give big results over time.
Start your Upper Body Workouts with Resistance Bands routine today, and become a little stronger, healthier and more confident every day.