
7 Simple Exercises to Improve Your Posture Fast
Simple exercises to improve your posture fast this sentence is the main solution to your problem today. In life, we spend most of our time sitting in front of the computer, leaning on the mobile screen, or forgetting to take care of our neck and back due to the pressure of work. As a result, bad posture gradually develops, which not only spoils the beauty of our appearance but also causes problems like back pain, neck strain, and fatigue.
Good posture is not just about standing up straight; it is the foundation of our body’s balance, confidence, and long-term health. The good news is that correcting posture is not very difficult. By spending a few minutes every day, you can quickly improve your posture through some simple exercises.
In this article, we will share simple exercises to improve your posture fast, which will help you improve your overall posture by strengthening your back, neck, and core.
Good posture not only protects you against back pain, it also improves your overall health and appearance- Harvard Health
7 Simple Exercises to Improve Your Posture
1. Wall Angels
This is a good and effective exercise that corrects bad posture, increases shoulder mobility, and strengthens the upper back and rotator cuff muscles.
Benefits
Improves posture: It prevents the shoulders from hunching forward and helps maintain proper posture by strengthening the muscles behind the shoulders.
Stretches chest muscles: This exercise helps loosen chest muscles that become tight due to sitting or working at a desk.
Increases shoulder stability: It stimulates the rotator cuff and scapular muscles, which increase the stability of the shoulder joint.
Reduces neck and back pain: Regular practice can help relieve tension and pain in the neck and upper back.
Correct method
Take a position: Go to a flat wall. Stand straight with your back, hips, and the back of your head against the wall. Place your feet about 6 to 12 inches away from the wall and bend your knees slightly so that your lower back is entirely against the wall.
Hand Positioning: Place your hands in a ‘W’ shape with your elbows bent at a 90-degree angle against the wall. Make sure that both your elbows and the backs of your hands are touching the wall.
Sliding: As you exhale, slowly push your elbows and the backs of your hands up without moving them off the wall. Try to make a ‘Y’ shape with your hands near your head. If your elbows or the backs of your hands come off the wall as you lift your hands, lift them only as far as they touch the wall. Hold this Position for 2-3 seconds.
Returning: Inhaling, slowly and controlledly, lower your hands back to the starting ‘W’ position.
Repeat: Repeat this process 10 to 15 times.
2. Cat-Cow Stretch
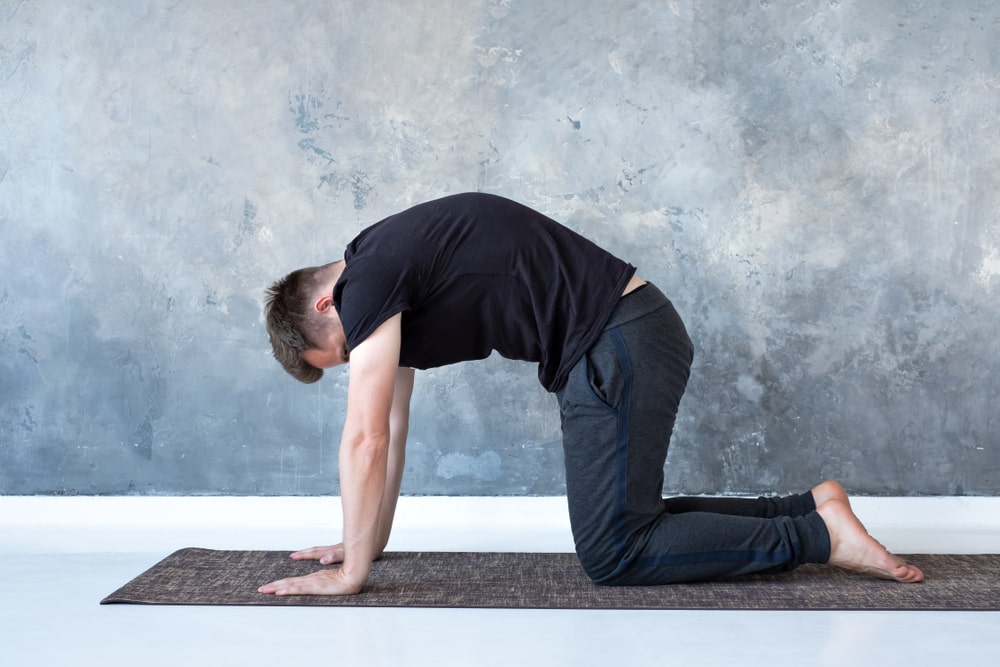
The Cat-Cow Stretch, known in Sanskrit as Marjariyasana-Vitilasana, is an essential and ubiquitous yoga pose. It primarily helps to flex the spine and increase awareness of the midsection.
Benefits
Flexes the spine: This exercise stretches the spine forward and backward, which increases spinal flexibility.
Relieves back pain: It helps to reduce tension in the lower back and neck, which is effective in reducing pain caused by poor posture.
Increases blood circulation: Improves blood flow around the spine.
Stimulates abdominal muscles: Gently activates the abdominal muscles, which helps increase core stability.
Calms the mind: Practicing this pose with proper breathing reduces stress and anxiety.
Correct method
This stretch is usually done as a warm-up before starting.
Starting Position
Tabletop Position: Start with your hands and knees on the floor. Your wrists should be under your shoulders, and your knees should be under your hips.
Hands and Feet: Spread your fingers out in front of you and keep your knees hip-width apart.
Spine: Keep your spine in a straight line, and keep your eyes focused on the floor.
Cat Pose
Exhale: Start exhaling slowly.
Spine Movement: Pull your stomach and hips inward and arch your spine in the opposite direction, like a bow, toward the ceiling.
Head Position: Slowly lower your head so that your chin is looking down toward your chest. Your shoulders should be away from your ears.
In this Position, your body should look like an angry cat.
Cow Pose
Inhale: Now start breathing in slowly.
Spinal Movement: Lower your belly towards the floor and arch your spine downward.
Head Position: Slowly lift your head and chin.
In this Position, your back should look like a loose cow.
Repetition
Slow Motion: Keep moving from Kat to Cow and from Cow to Kat dynamically, matching the pace of your breathing.
Repeat this 10 to 20 times.
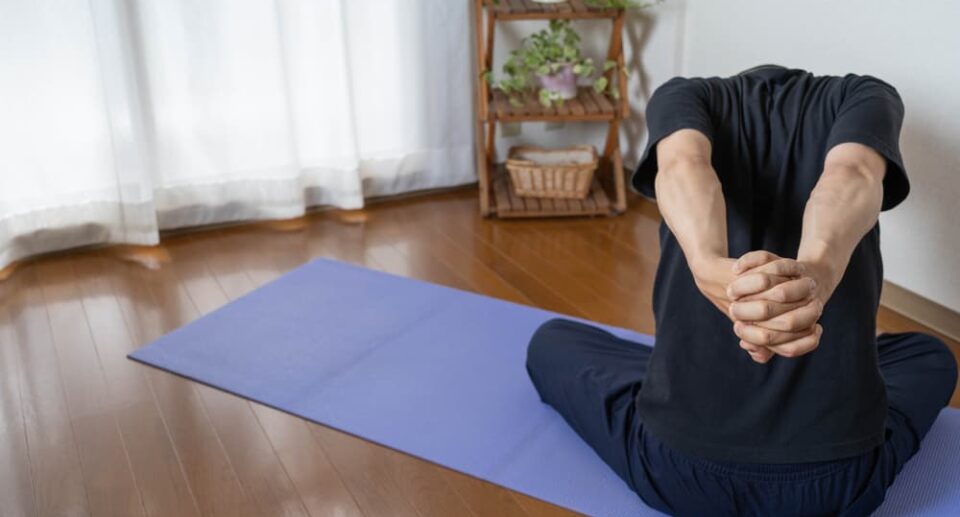
3. Shoulder Blade Squeeze

Benefits
Prevents hunchback: This exercise pulls the shoulders back, which prevents them from leaning forward while sitting or walking.
Rotator cuff strengthening: Helps strengthen the muscles that provide stability to the shoulder joint.
Chest expansion: Regular practice gently stretches the chest muscles, which can improve breathing.
Easy to do: It can be done anytime, anywhere, sitting or standing.
Proper method
You can do this exercise standing or sitting. Standing upright is better than sitting.
Starting position
Standing or sitting: Stand or sit comfortably upright. Place your feet shoulder-width apart and your arms hanging naturally at your sides.
Shoulder position: Start by keeping your shoulders relaxed, away from your ears.
Squeeze
Pull back: Take a deep breath and slowly pull your shoulder blades back towards your spine (as if you were trying to squeeze them together in the middle).
Tighten: Imagine that there is a pencil between your shoulder blades and you are trying to squeeze it. You will feel a stretch in the muscles in your middle back.
Neck Caution: Essential: Do not let your neck or shoulders rise towards your ears during this time. Only the shoulder blades should move back.
Hold: Hold this contraction for 5 to 10 seconds. Continue breathing normally during this time.
Relax: As you exhale, slowly relax the muscles and return to the starting position.
Repeat: Repeat this process 10 to 15 times.
4. Chin Tucks
The chin tuck exercise mainly strengthens the deep muscles of the neck and lengthens the muscles at the back of the neck, which helps to bring the head back into the correct position of the spine.
Benefits
Forward-leaning posture correction: This is the most effective way to correct the problem of ‘text neck’ or forward-leaning neck.
Neck pain relief: Reduces pressure on the neck muscles and helps reduce tension or pain.
Cervical spine stabilization: Strengthens the muscles that stabilize the cervical spine.
Indirect help in reducing double chin: Although this is mainly a posture exercise, the skin under the chin may be slightly taut due to the correct position of the neck muscles, which also indirectly helps in reducing double chin.
Correct method
This exercise can be done in any position, sitting, standing, or lying down. However, it is best to start by sitting or leaning against a wall.
Starting position
Sitting or standing: Sit or stand up straight. Keep your shoulders relaxed and your gaze straight ahead.
Spine: Make sure your spine is straight and your ears are over your shoulders.
Movement
Chin Tuck: Now gently pull your chin toward your chest, as if you are creating a “double chin.”
Head Movement: The movement of your head or neck should only be a sliding backward movement, not a downward or upward movement. Imagine your head is against a wall and you are pushing it backward.
Feeling: You should feel a slight stretch or lengthening in the back of your neck and a slight pressure under your chin.
Hold: Hold this position for 5 to 10 seconds. Continue breathing normally.
Relax: Slowly relax your chin forward and return to the starting position. Do not do this quickly.
Repeat: Repeat this 10 to 15 times. This exercise can be done 2 to 3 times a day.
5. Plank Hold

The Plank Hold is an isometric exercise, meaning that the muscle is held in tension without changing its length. It increases overall body stability and strength.
Benefits
Firm Core: It strengthens the abdominal muscles, obliques, and lower back muscles together, which are essential for good posture.
Reduces Back Pain: Strengthening the abdominal and lower back muscles reduces stress on the spine, which reduces lower back pain.
Improves Posture: A strong core helps keep your body upright and prevents you from leaning forward.
Improves Balance: It increases body stability, which improves overall balance.
Correct Method
The Plank Hold can generally be done in two ways: with your elbows resting on your hands or with your palms resting on your elbows. The elbow-rested plank is more effective for improving posture.
Starting Position
Ground Touch: Lie facedown on the floor.
Elbow Position: Keep your elbows just below your shoulders and your forearms parallel to the floor. Hold with your palms pressed into the floor or clench your fists.
Hold
Raise: Exhale and lift your body off the floor. Your body should be in a straight line from head to toe. Your hips should not be lowered too high or too low.
Muscle Contraction: Tighten your abdominal muscles and glutes.
Gaze: Keep your neck straight with your spine.
Duration
Try to hold for 30 seconds at first.
Gradually increase the time as per your ability (e.g., 1 minute or more).
Return
After the specified time, slowly lower your knees and then your entire body to the floor.
6. Child’s Pose
Child’s Pose is a relaxation pose that helps loosen the muscles in the spine and lower back.
Benefits
Relieves lower back tension: It gently stretches the spinal muscles, especially after exercises like planks or bridges.
Hip flexor and thigh stretch: Creates a gentle stretch in the muscles of the hips and thighs.
Relaxation and stress reduction: It calms the nervous system and helps to relieve anxiety and stress.
Blood circulation: It directs blood flow to the brain and helps to relieve fatigue.
Proper method
Starting position
Vajrasana: Kneel. Place your hips over your heels.
Knee distance: You can keep your knees together or as wide as the width of the mat (whichever is more comfortable for your stomach).
Movement
Forward bend: As you exhale, bend your body forward. Your forehead should reach close to the floor.
Arm Rest:
Relaxation: Place your arms at your sides for comfort, palms facing the ceiling.
Extension: Alternatively, you can extend your arms forward to increase shoulder mobility and lengthen your back.
Hold
Hold this pose for as long as you feel comfortable. This can be anywhere from 30 seconds to a few minutes.
Concentration: Focus on your breathing and allow your back muscles to relax further with each exhale.
Return
Slowly inhale and use your arms to lift your body back to a sitting position.
7. Bridge Pose
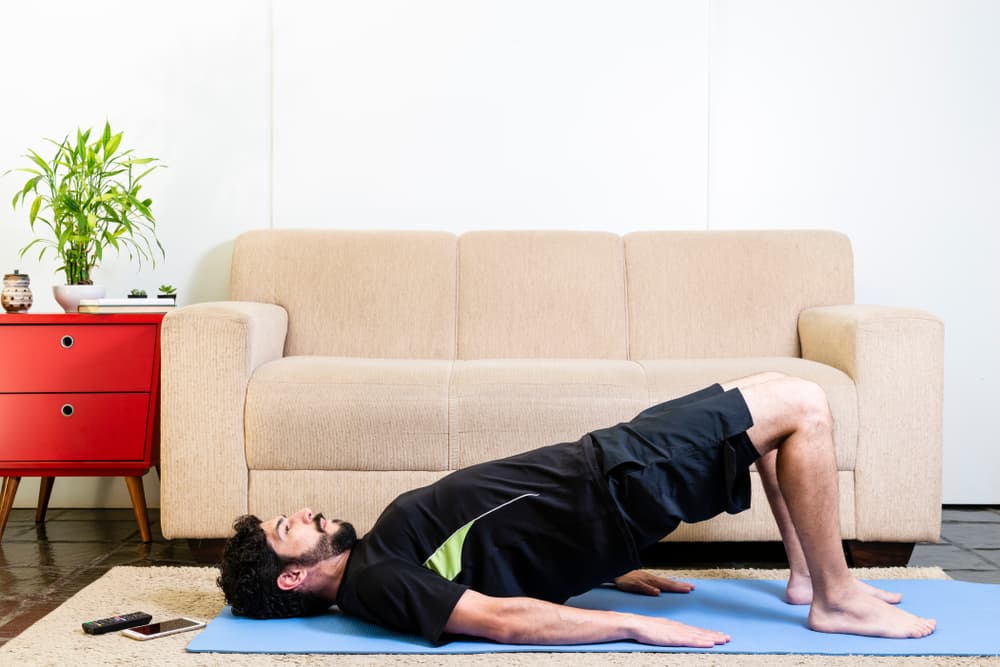
The Bridge Pose is an exercise that combines strengthening and stretching, which helps activate muscles that have become loose due to poor posture.
Benefits
Strengthens postural muscles: This exercise mainly strengthens the glutes and hamstrings. When these muscles are strong, it is easier to keep your spine straight.
Lower Back Protection: Strengthening the core and hip muscles reduces pressure on the lower back, which helps relieve pain.
Chest and Shoulder Stretches: This helps loosen the chest and shoulders that are hunched forward due to desk work.
Spinal Mobility: Helps maintain spinal flexibility.
Correct Method
Starting Position
Lying on the Floor: Lie on your back on the floor.
Legs: Bend your knees and place your feet flat on the floor. Your feet should be hip-width apart, and your heels should be close to your hips. You can check if you can reach your heels by reaching out.
Hands: Place your hands at your sides, palms facing the floor.
Movement
Strengthen: Take a deep breath. Start exhaling and tighten your glutes at the same time.
Rise: Lift your lower back, then your middle back, and finally your upper back off the floor. Your shoulders, neck, and head should be on the floor.
Straight Line: Try to create a straight line from your shoulders to your knees. Your knees should not move outward.
Hold
Contraction: Tighten your glutes in this position. Your chin should be slightly away from your chest.
Hold this position for 10 to 30 seconds. Breathe normally during this time.
Return
As you exhale, slowly and in a controlled manner, lower each part of your spine to the floor, starting with your upper back. Your buttocks should finally touch the floor.
Repeat
Repeat this process 10 to 15 times.
Lifestyle changes
1. Desk posture
The leading cause of bad posture is sitting in the wrong position for a long time.
Eye level: Place your computer monitor or screen at a height that is slightly below your eye level. This will prevent your neck from leaning forward.
Sitting posture: While sitting in a chair, keep your back straight and lean back on the chair. Support your lower back with a small pillow or rolled towel.
Foot position: Place your feet flat on the floor or on a footrest. Do not let your legs hang down or cross.
Take breaks: Stand up every 30-40 minutes, walk around, and do some stretching.
2. Smartphone usage precautions
Hold the phone up: When using a mobile or tablet, hold the phone at a height close to your eyes, rather than bending your neck down.
Avoid “text neck”: Stop looking at the screen for a long time by bending your neck forward. Do the chin tuck exercise regularly.
3. Sleep Poster
It is essential to keep your spine straight even while sleeping.
Mattress and Pillow: Use a firm to medium-sized mattress that will support your spine. Avoid using pillows that are too high or soft.
Side Sleeping: If you sleep on your side, place a pillow between your knees. This will keep your hips and spine in line.
Stomach Sleeping: If you sleep on your stomach, place a pillow under your knees, which will reduce the pressure on your lower back.
4. Techniques for Carrying Heavy Things
Using a Backpack: If you carry a load, use a backpack and use both shoulder straps. Avoid hanging a heavy bag on one shoulder.
Balance: Make sure the weight of the bag is not too heavy and that the weight is distributed evenly.
FAQ
Q: How fast can I see results from Simple Exercises to Improve Your Posture Fast?
A. Most people notice better posture within 2-4 weeks of doing these exercises daily. Consistency is the key to lasting results.
Q: Can beginners do Simple Exercises to Improve Your Posture Fast at home?
A. Yes! These moves are beginner-friendly and need no equipment just 10-15 minutes a day to improve posture and strength.
Final Thoughts on Simple Exercises to Improve Your Posture Fast
Developing good posture isn’t something you can do overnight it’s something you build gradually through regular practice and awareness. By spending just a few minutes each day following these Simple Exercises to Improve Your Posture Fast, you can easily strengthen your neck, back, and core muscles. This will help you regain balance, increase your confidence, and reduce fatigue.
Remember, posture is more than just your body position it’s a reflection of your self-expression. So start incorporating these exercises into your daily routine today, and watch your posture and vitality begin to change together.


4 Comments
Very nice article, just what I wanted to find.
My brother recommended I might like this website.
He was totally right. This post actually made my day. You cann’t imagine just how much
time I had spent for this info! Thanks!
Attractive component to content. I just stumbled upon your weblog and in accession capital to claim that I
get actually enjoyed account your blog posts.
Any way I will be subscribing for your feeds and
even I success you access constantly quickly.
Hey there! This is my first visit to your blog! We are a team of volunteers
and starting a new initiative in a community
in the same niche. Your blog provided us useful information to work on. You have done a extraordinary job!